Online surveys are an effective helper in growing your company. They have their place not only when finding out how satisfied your customers and employees are or when checking customer loyalty, but also in research in the areas of HR, IT, company events, healthcare or education.
Creating a survey
In the upper menu, in the Surveys section, choose "Create new survey". Name the survey in the following window and pick a survey from the library (in the drop-down menu), or create your own survey by clicking the "Create survey" button in the chosen part.
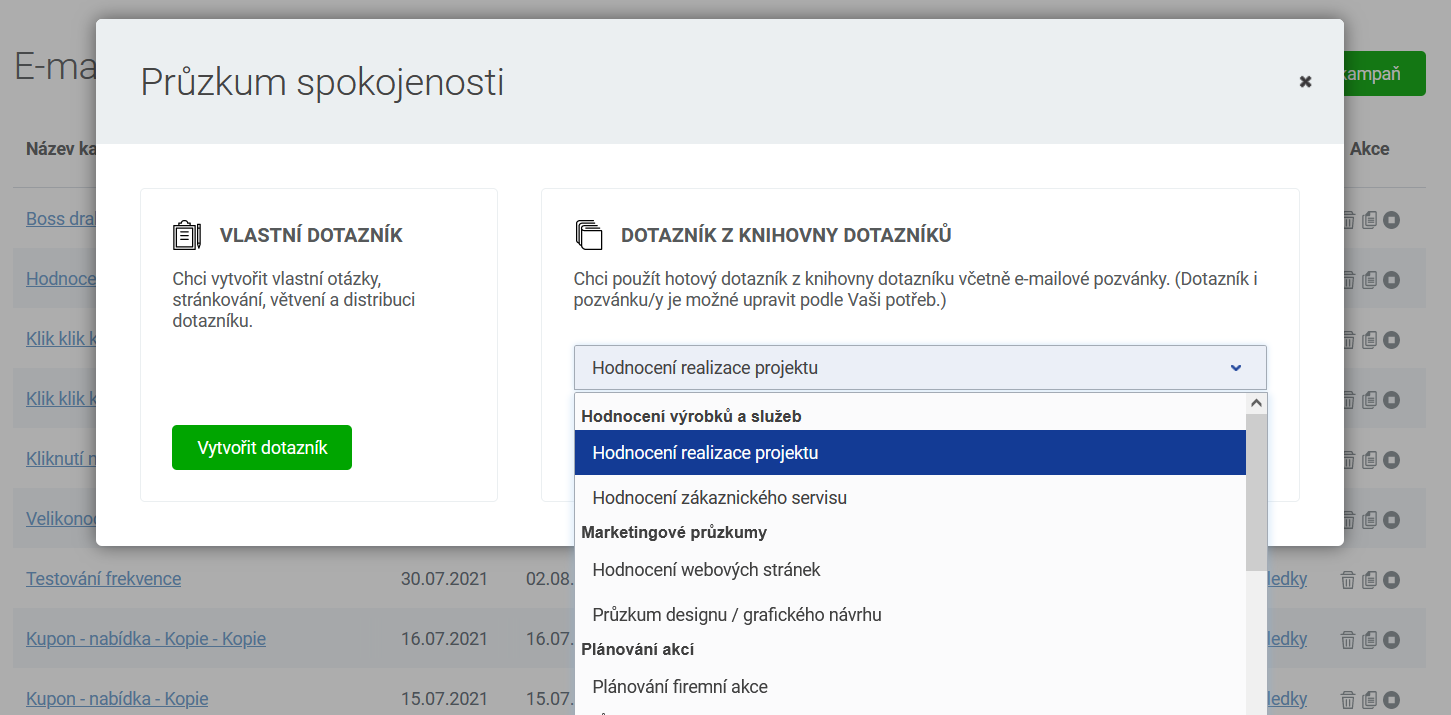
Set the survey up
When creating a survey you have all its settings on a single page.
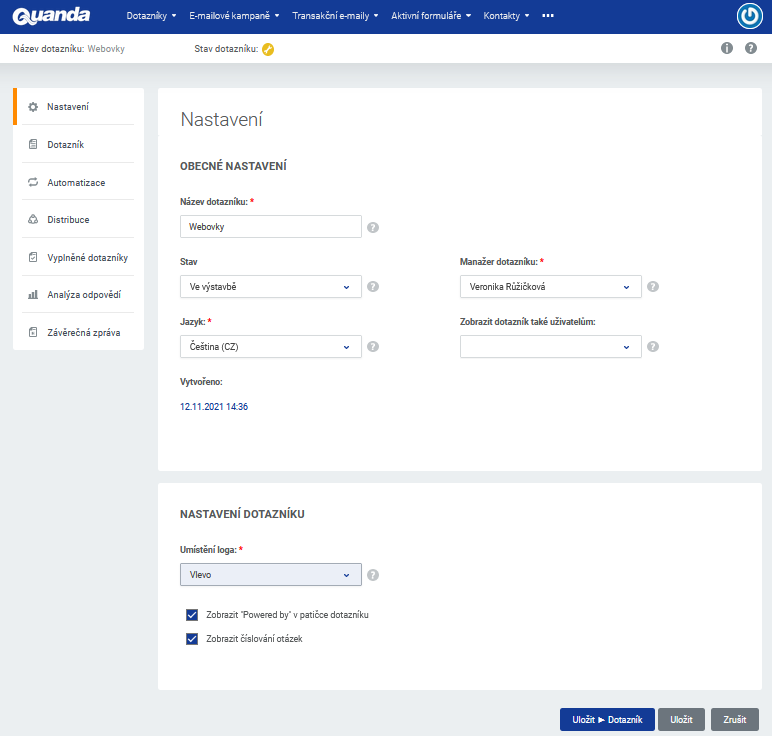
On this page you can change the name of the survey.
On the "Settings" page pay attention to a few fields. The first setting on this page is the language selection. In the "language" field you can choose the language the control buttons are displayed in. If you send the survey to German speaking recipients, for example, this setting lets you display the control buttons in German.
Using the "Show the survey to users" field you can also invite other users into this survey. They will then see this survey in the survey overview in their account after logging in to Quanda.
The "Admin" role sees all created campaigns in their account after logging in to Quanda, regardless of who the campaign manager is. The manager can be changed on this page as well.
The "Project manager" role sees all campaigns they created in the campaign overview in their account after logging in to Quanda, and also all campaigns they were invited to.
The "Consultant" role only sees the campaigns they were invited to in the campaign overview in their account after logging in to Quanda. If the "Consultant" role creates a new campaign, they have to invite themselves into it. If they do not do this, they lose the rights to the campaign they are currently creating once the "Settings" page is saved and will not be able to continue preparing it.
This way you can build a team of several people and split the work.
You will find more details here > User roles.
An important element on this page is the state setting as well. While the survey is being built, the project is in the state of the same name. If you want to publish the survey, you have to switch the project state to "Ready to use", which activates the link in the survey itself.
If you have your company logo added in the contact details (… / Settings / Contact details), you can pick its placement in the drop-down. The logo is always shown in the header of the survey page.
You can allow or block the display of the "Powered by" field in the survey footer.
If you need your own question numbering (for example 1.a, 1.b, 2.a, 2.b and so on), you can turn off the automatic numbering created by Quanda.
Do you have questions? We will be happy to answer them. Just contact our customer support at +420 605 163 892, e-mail: support@onquanda.com.
Updated prosinec 30, 2021