Once you are through the settings page, your next step is to build the content of the active form.
How to work with the form
The form serves to collect contacts, so the only mandatory field is the e-mail address, the rest is optional. In the right-hand section you can pick a field and move it anywhere in the form with drag and drop. The layout can be left, centre and right, so you can place two fields on one row.
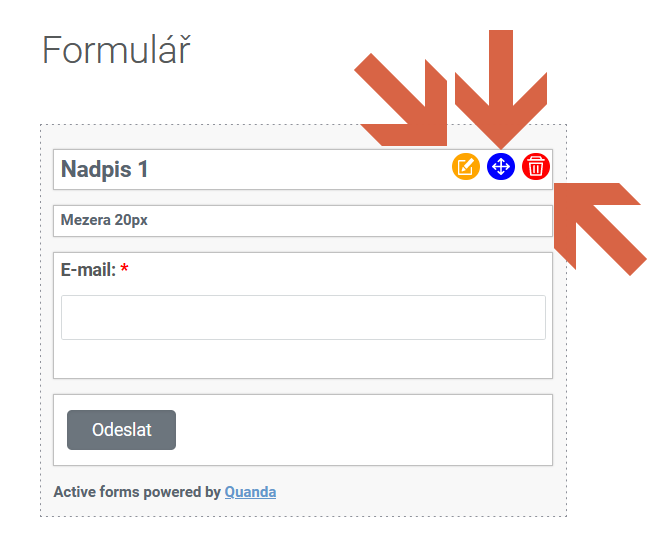
The default setting is a prepared form with a heading, a spacer, an e-mail address and a submit button. You can edit a section using the orange button in the field, and move or remove it using the blue button.
The individual sections
In the sections you pick the fields you want contacts to fill in, and also the fields that let you describe, lay out and present the form well.
General
This section helps you with labels and layout: heading, text, image, line, video, button, spacer and check box.
Contacts
Almost all the information you can record with a contact in Quanda can be put into the form, filled in there and then worked with, such as first name, surname, phone, address, custom fields according to your own specification and others.
Companies
Company details are optional, but if you pick the company name, the field becomes mandatory. You can then pick further fields concerning the details of a legal entity or a natural person.
Once you have the content laid out, continue to the Design section using the Done button in the top right corner.
Do you have questions? We will be happy to answer them. Just contact our customer support at +420 605 163 892, e-mail: support@onquanda.com.
Updated leden 4, 2022